Advanced Filter in Excel

I have seen a lot of people using the AutoFilter (Filter) in Excel with ease, but I’ve been surprised to see that not many people use the Advanced Filter in Excel which, when dealing with lots of information or applying several filters, can save time and effort.
In this post I will quickly go over the standard filter, but it is assumed that you know the basics of filtering. Then I will move on to the Advanced Filter.
If you want to use the same file as me, click on this FILTER FILE link and download from there.
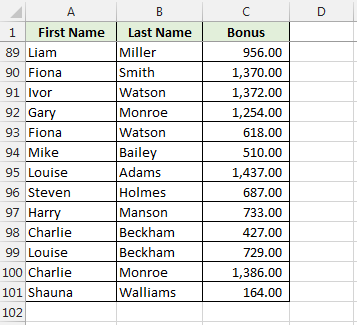
This file includes a sheet called “Data” which has a list of names and bonus amounts.
This is not unlike a file I actually use, but about one fifth the size and each month I would filter it to find anywhere between 20 and 100 names.
This filtering process used to take quite a bit of time and the monotony of the task left it open to mistakes.
The Advanced Filter makes this much quicker, easier, and frankly less boring :).
But first, let’s talk about the standard AutoFilter.
AutoFilter
The Filter button can be found on the Data Ribbon in the Sort & Filter section.

When you click on this, drop down arrows are added to our headers.

From these drop-down arrows, there are 3 methods to Filter.
The following is not an exhaustive list of the things you can do with the AutoFilter, just an overview. This post is more about the usefulness of the Advanced Filter.
1 – Simple Filter
When you click on the drop-down arrow to filter you will see a list of all values in that column.
By default, the check box beside Select All is ticked. This means that all values are selected and included in your filter.
You can deselect any items in the list.
Or, you can untick the check box beside Select All, which will deselect everything and then you can select the values you want to filter for.

2 – Filter by Format
In the last image, the option to “Filter by Color” was greyed out.
This was because all the cells in column A had the same formatting.
For the sake of demonstration, I have changed some cells in column A to have a yellow fill and some to have red font.
Now I have the option to Filter by Color. I can filter by Cell Color or Font Color.

3 – Filter by Values
The 3rd type of filter that I’m going to mention here is the filter by values.
Column A contains text, so, based on this I have the option to filter by Text Filters.

Some of these text filters are probably self-explanatory so I won’t go into each of them here.
Column C of my file contains numeric values, the filter on this column will be for Number Filters, which are different to the Text Filters and more specific to numbers.

If the column contained dates, then Excel would show Date Filters.
Note, if your column contains both numbers and text, Excel does not give you both Text and Number Filters.
Advanced Filter
It’s taken over 500 words, but we are finally here, ready to talk about Advanced Filters!
Before continuing, make sure your data does not have any duplicated headings, or this could cause problems when applying the advanced filter.
Advanced Filter Based On List Of Criteria
I’ve added a new sheet to my file called “Filter”. This is where I will have my list that I want to filter for.
- The header on this list should be the same as the header in my main table of data. I’m going to start with “First Name”
- I’ve added 3 names and I want to filter the Data sheet for these names.

- On the Data sheet, beside the Filter button, you should see an Advanced option.
- This opens the Advanced Filter box.
- The List Range should match your table of information that you want to filter. This should include the headers.
- The Criteria Range will be the list you created that you want the filter based on. In my case it is cells A1 to A4 on the Filter sheet.

- Click OK and you will see the filter shows all people with the names that match the filter criteria.

- Let’s change our criteria list a bit. I’ve added in a Last Name column and beside Alan entered Hunt.

- I go back to the Data sheet and amend the Advanced Filter criteria to cover cells A1 to B4. Note the header has to match the headers on the data the filter is being applied to.

- Because Alan and Hunt are side by side, the filter criteria is for Alan Hunt and then all Brian and Charlies. With no other criteria beside Brian or Charlie, the filter is for all Brian and Charlies.

- If I wanted to filter to show all Alans, Brians Charlies and all people with a last name Hunt, I would need to set my criteria like this.

- My advanced filter criteria range will be from A1 to B5

- Without a last name beside a first name, the filter criteria will be for all those first names.
- Without a first name beside the last name Hunt, the filter criteria will be for all people with a last name Hunt

If you use the AND or OR functions, you can think of the advanced filters like this:
- If the filter criteria has 2 criteria on the same row (Alan in A2 and Hunt in B2), this is like an AND function. The filter will only return values where all criteria is met, i.e., the first name is Alan AND the last name is Hunt.
- If the filter criteria has multiple columns, but no values side by side (Alan, Brian and Charlie between A2 and A4 and Hunt in B5), this is like the OR function. The filter will return values where the name is Alan, Brian, Charlie OR last name Hunt.
The last Advanced Filter type that I will show you will apply in cases where you might want to filter for values between 2 options.
- If I wanted to filter for bonus values between 500 and 1000, my filter criteria list would include 2 columns with the header “Bonus”. The columns would look like this.

- I make this my criteria range for the advanced filter:

- This filter would give me all people with a bonus value between 500 and 1000 inclusive.
- If I wanted to filter for all people with a first name Alan and with a bonus between these values, my criteria range should look like this:

- If I wanted to filter for all Alans and Charlies who have a bonus between these values, my criteria range would be:

If you wanted to clear the filter, there is a Clear option above the Advanced Filter button.

I won’t go into every possible use of the Advanced Criteria.
I hope that if you think it is something that you might use, that you understand it and can apply it.
The best way is usually to play around with the options to see what you come up with yourself.
The Advanced Filter is something I might only use a couple of times a month, but given that I have to filter for a lot of names out of several hundred, it does save me a lot of time!!
