Canvas Basics – 07 Random Positions

This is the seventh post in this series looking at the <canvas> element in HTML5.
Each post will give a new element of snippet of code that can be put together to create your own games.
So far we have displayed text on screen, looked at the mouse’s X and Y co-ordinates on the canvas, moved a shape automatically and moved a shape using the keyboard’s arrow keys and tested when two objects collided.
This is a follow on from the posts looking at maths in games (click here to read the first post).
If you are not already familiar with HTML, you can read through the posts starting here (click to read).
The first 6 posts in this series can be found at:
- Canvas Basics – 01 Hello World
- Canvas Basics – 02 Mouse Detection
- Canvas Basics – 03 Moving An Object
- Canvas Basics – 04 Move An Object Using The Keyboard
- Canvas Basics – 05 Limiting Movement To Canvas
- Canvas Basics – 06 Collision Detection
You can start reading the above links if you have no HTML/Javascript/Canvas experience, or if you have some of the basics covered already, you can continue with this post.
This post is going to show you how to limit the movement of our object to the canvas area.
What you’ll need
For these posts you will need a text editor (Notepad on Windows for example) and a relatively up to date browser (Google Chrome is my preference).
In the screenshots you are about to see, you will see that I am not using Notepad for coding, this is because I am using a different package which allows you to see line numbers, this will make it easier for me to comment on particular lines.
Skeleton
If you are following these posts, you should have a skeleton2.html file from the last post.
If you have not been following these posts, copy the code below to a text editor file and save it as “skeleton2.html”.
You can change the page title in line 3 if you wish.

The code for skeleton2.html is:
<!DOCTYPE html>
<head>
<title>Collision Detection And Random Positions</title>
</head>
<body>
<canvas id="canvas">
Your browser doesn't support Canvas, try another or update
</canvas>
<script src="game4.js"></script>
</body>
</html>
Save this file.
Going forward, you are going to view the “skeleton2.html” file in your browser, but all the code we are about to create will be entered in the game4.js file in your text editor.
game4.js
In your text editor, open game3.js and save it as game4.js.
If you have not been following these posts, copy the final code from game3.js below into a blank text editor file and save as game4.js.
var canvas = document.getElementById('canvas');
var ctx = canvas.getContext('2d');
canvas.width = window.innerWidth;
canvas.height = window.innerHeight;
var keys = {};
window.addEventListener('keydown', function (e) {
keys[e.keyCode] = true;
e.preventDefault();
});
window.addEventListener('keyup', function (e) {
delete keys[e.keyCode];
});
function Box(options) {
this.x = options.x || 10;
this.y = options.y || 10;
this.width = options.width || 40;
this.height = options.height || 50;
this.color = options.color || '#000000'
this.speed = options.speed || 5;
this.direction = options.direction || 'right';
this.collideWith = function(otherobject) {
var myleft = this.x;
var myright = this.x + (this.width);
var mytop = this.y;
var mybottom = this.y + (this.height);
var otherleft = otherobject.x;
var otherright = otherobject.x + (otherobject.width);
var othertop = otherobject.y;
var otherbottom = otherobject.y + (otherobject.height);
var collision = true;
if ((mybottom <= othertop) ||
(mytop >= otherbottom) ||
(myright <= otherleft) ||
(myleft >= otherright)) {
collision = false;
}
return collision;
}
}
var player = new Box({
X: 10,
y: 10,
width: 50,
height: 50,
color: '#44ee11',
speed: 5
});
var food = new Box({
x: 100,
y: 100,
width: 25,
height: 25,
color: '#ee3344'
});
function input(player) {
if (37 in keys) {
if (player.x - player.speed > 0) {
player.x -= player.speed;
}
player.direction = 'left';
}
if (39 in keys) {
if (player.x + player.width + player.speed < canvas.width) {
player.x += player.speed;
}
player.direction = 'right';
}
if (38 in keys) {
if (player.y - player.speed > 0) {
player.y -= player.speed;
}
player.direction = 'up';
}
if (40 in keys) {
if (player.y + player.height + player.speed < canvas.height) {
player.y += player.speed;
}
player.direction = 'down';
}
}
function drawBox(box) {
ctx.fillStyle = box.color;
ctx.fillRect(box.x, box.y, box.width, box.height);
}
function update() {
input(player);
}
function draw() {
if (player.collideWith(food)) {
ctx.font = "24px Arial";
ctx.fillStyle = "rgb(255,0,255)";
ctx.fillText("COLLISION DETECTED", 50, 50);
} else {
ctx.clearRect(0, 0, canvas.width, canvas.height);
drawBox(player);
drawBox(food);
}
}
function loop() {
update();
draw();
window.requestAnimationFrame(loop);
}
loop();
Make sure that the game4.js and skeleton2.html files are both saved in the same location/folder.
Canvas Basics – Random Positions
This post will show you how to randomly position a shape on screen.
When the player collides with the food object, we will randomly place the food object again.
Change The Canvas Size
We will change the size of our canvas area before continuing.
Change lines 4 and 5 to have width and height of 500 and 400.
This is not a necessary step, we could have left the width and height as it was, but I’ve decided to change it now based on where I think this post will end up.

- LINE 4 – canvas.wdith = 500;
- LINE 5 – canvas.height = 400;
Random Positions For Food
Next we will create our food object in random positions.
Earlier, we set the X and Y values as 100 on both axes.
Now we are going to change these set values to code that will create random positions.

This code will be made up of two Math objects.
- Math.floor – this takes a number with decimals and rounds it down to the nearest whole number. Math.floor(9.8) would be 9, Math.floor(4.1) would be 4 and so on.
- Math.random – this returns a number between 0 (inclusive) and 1 (exclusive). Math.random() could give you 0.001, 0.987654321, etc.
We are going to multiply a random number by the difference between our canvas width and height and the food’s width and height.
Why do this?
If our random number was 0.999, for example, and this was multiplied by the canvas width (500), this would give our food an X value of 499. The left edge of our food would be at 499, which means that most of our food object would be off the canvas area.
Instead, we allow for the width of the food by deducting it from the canvas area.
Change lines 57 and 58, which set the X and Y values of the food as follows:
- LINE 57 – x: Math.floor(Math.random() * (canvas.width-25)), multiply the difference between the canvas width and food width by a random number, then round this down to the nearest integer. This will be the X value of our food.
- LINE 57 – y: Math.floor(Math.random() * (canvas.height-25)), multiply the difference between the canvas height and food height by a random number, then round this down to the nearest integer. This will be the Y value of our food
var food = new Box({
x: Math.floor(Math.random() * (canvas.width - 25)),
y: Math.floor(Math.random() * (canvas.height - 25)),
width: 25,
height: 25,
color: '#ee3344'
});
Set Random Positions After Collision Detection
As it stands, our draw function displays “COLLISION DETECTED” on screen if it detects a collision.
We are going to replace lines 102 to 104 in the image below.

What we are going to say now is that if there is a collision detected, then:
- clear the canvas (a copy of line 106 above)
- redraw the player object (a copy of line 107 above)
- set new random X and Y values for the food object
- redraw the food object (a copy of line 108 above)
The code to be entered from line 102 will be
- LINE 102 – ctx.clearRect(0, 0, canvas.width, canvas.height); this is the same as the clearRect instruction we have already seen. It basically clears everything on the canas.
- LINE 103 – drawBox(player); this redraws our player object
- LINE 104 – food.x = Math.floor(Math.random() * (canvas.width – 25)); this is changing the X value of the food object and giving it a new random position
- LINE 105 – food.y = Math.floor(Math.random() * (canvas.height – 25)); similar to the last line, this is changing the Y value of the food object and giving it a new random position.
- LINE 106 – drawBox(player); this redraws the food object, but now it has a new random X and Y value. When it is redrawn, it will be at the new position.
function draw() {
if (player.collideWith(food)) {
ctx.clearRect(0, 0, canvas.width, canvas.height);
drawBox(player);
food.x = Math.floor(Math.random() * (canvas.width - 25));
food.y = Math.floor(Math.random() * (canvas.height - 25));
drawBox(food);
} else {
ctx.clearRect(0, 0, canvas.width, canvas.height);
drawBox(player);
drawBox(food);
}
}
Save your text editor file and refresh your browser.
You should see the food object being placed in random positions and then when you make the player collide with the food, the food should be redrawn in random positions again.
We’re getting near the end of this post, a few more lines of code will add a score to the game, we will use this to update every time the player and food objects collide.
Update Scores
We will add code to increase the score every time a collision is detected.
For demonstration we can also add in a value that decreases every time a collision is detected.
The “score” variable will start at zero (this will increase).
The “livesLeft” variable will start at 10 (this will decrease).
Create these variables just below where you created the keys array variable.

- LINE 8 – var score = 0;
- LINE 9 – var livesLeft = 10;
Next we will add a new function called updateScoreBoard.
I’ve created this between the update and draw functions at line 102.
This will display the score and number of lives left at the bottom of the canvas area.

- LINE 102 – function updateScoreBoard() { this creates the updateScoreBoard function
- LINE 103 – ctx.font = “24px Arial”; the font size of our scoreboard will be 24
- LINE 104 – ctx.fillStyle – “rgb(255, 0, 255); this sets the font color
- LINE 105 – var str = “Score = ” + score + ” – Lives Left = ” + livesLeft; This string variable will be what is displayed in our text. If the score value was 4 and the livesLeft value was 6, this string would be “Score = 4 – Lives Left = 6”.
- LINE 106 – ctx.fillText(str, 50, 380); this fills our text with the value of the str variable (from the last line) and puts it at X position 50 and Y position 380.
- LINE 107 – } this closes our updateScoreBoard function
To reduce the chance of the food object appearing on top of our ‘scoreboard’ we will change the random positions of the food object.
We also need to update the draw function to call the updateScoreBoard function, otherwise the scoreboard won’t appear.
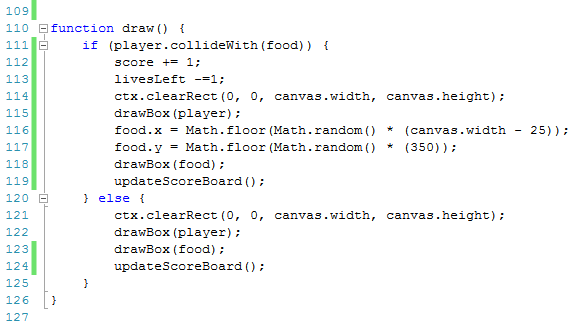
The first change will be to line 117 in the image above.
Instead of the random number for the Y value being based on the canvas height minus the food height, it will be set as 350. The food object won’t be redrawn below 375 (350 + food height). Our scoreboard is set to appear at 380, this can be changed, or the 350 can be changed if you wanted to prevent the food from ever appearing on top of the scoreboard.
At lines 119 and 124 we are also going to call the updateScoreBoard function so that the scoreboard actually appears on the canvas.
The draw function is now as follows
function draw() {
if (player.collideWith(food)) {
score += 1;
livesLeft -=1;
ctx.clearRect(0, 0, canvas.width, canvas.height);
drawBox(player);
food.x = Math.floor(Math.random() * (canvas.width - 25));
food.y = Math.floor(Math.random() * (350));
drawBox(food);
updateScoreBoard();
} else {
ctx.clearRect(0, 0, canvas.width, canvas.height);
drawBox(player);
drawBox(food);
updateScoreBoard();
}
}
The last change we will make will be to the original food variable.
We will make a similar change to the original Y value of the food object:

- LINE 60 – y: Math.floor(Math.random() & (350)),
Review
Save your text file and refresh your browser.

You should note the following:
- The food object appears randomly initially
- There is a scoreboard at the bottom of the canvas
- When the player object collides with the food object, the food object moves and the scoreboard updates
We are getting much closer to a playable game now!
Next we will look at bouncing and deflecting.
For now, play around with your variables and string in your file as it is.
The game4.js final file as it stands now is:
var canvas = document.getElementById('canvas');
var ctx = canvas.getContext('2d');
canvas.width = 500;
canvas.height = 400;
var keys = {};
var score = 0;
var livesLeft = 10;
window.addEventListener('keydown', function (e) {
keys[e.keyCode] = true;
e.preventDefault();
});
window.addEventListener('keyup', function (e) {
delete keys[e.keyCode];
});
function Box(options) {
this.x = options.x || 10;
this.y = options.y || 10;
this.width = options.width || 40;
this.height = options.height || 50;
this.color = options.color || '#000000'
this.speed = options.speed || 5;
this.direction = options.direction || 'right';
this.collideWith = function(otherobject) {
var myleft = this.x;
var myright = this.x + (this.width);
var mytop = this.y;
var mybottom = this.y + (this.height);
var otherleft = otherobject.x;
var otherright = otherobject.x + (otherobject.width);
var othertop = otherobject.y;
var otherbottom = otherobject.y + (otherobject.height);
var collision = true;
if ((mybottom <= othertop) ||
(mytop >= otherbottom) ||
(myright <= otherleft) ||
(myleft >= otherright)) {
collision = false;
}
return collision;
}
}
var player = new Box({
x: 10,
y: 10,
width: 50,
height: 50,
color: '#44ee11',
speed: 5
});
var food = new Box({
x: Math.floor(Math.random() * (canvas.width - 25)),
y: Math.floor(Math.random() * (350)),
width: 25,
height: 25,
color: '#ee3344'
});
function input(player) {
if (37 in keys) {
if (player.x - player.speed > 0) {
player.x -= player.speed;
}
player.direction = 'left';
}
if (39 in keys) {
if (player.x + player.width + player.speed < canvas.width) {
player.x += player.speed;
}
player.direction = 'right';
}
if (38 in keys) {
if (player.y - player.speed > 0) {
player.y -= player.speed;
}
player.direction = 'up';
}
if (40 in keys) {
if (player.y + player.height + player.speed < canvas.height) {
player.y += player.speed;
}
player.direction = 'down';
}
}
function drawBox(box) {
ctx.fillStyle = box.color;
ctx.fillRect(box.x, box.y, box.width, box.height);
}
function update() {
input(player);
}
function updateScoreBoard() {
ctx.font = "24px Arial";
ctx.fillStyle = "rgb(255,0,255)";
var str = "Score = " + score + " - Lives Left = " + livesLeft;
ctx.fillText(str, 50, 380);
}

function draw() {
if (player.collideWith(food)) {
score += 1;
livesLeft -=1;
ctx.clearRect(0, 0, canvas.width, canvas.height);
drawBox(player);
food.x = Math.floor(Math.random() * (canvas.width - 25));
food.y = Math.floor(Math.random() * (350));
drawBox(food);
updateScoreBoard();
} else {
ctx.clearRect(0, 0, canvas.width, canvas.height);
drawBox(player);
drawBox(food);
updateScoreBoard();
}
}
function loop() {
update();
draw();
window.requestAnimationFrame(loop);
}
loop();
Disclaimer
I am not claiming that the code that I use in these examples is the best, most efficient and up to date code.
Code gets updated and improved over time, what is best practice today may not be tomorrow.