HTML Basics of Lists
This post will go through creating simple lists for your website. It covers ordered lists, unordered lists, definition lists and nested lists.
In the last blog post we created a file called “index.html”.
Click here to review the blog if you haven’t read through it already and want to continue following this series.
If you’re ready to begin, let’s get to it…..
HTML Basics of Lists
- Create a new file in your text editor
- Save the file as “music.html” in your parent WEBSITE folder
- Enter the default code per below
Alternatively, you can open the index.html file that you created already, save it as “music.html” and delete the title and header from the body so it looks like the code above.
Page Title
On line 5 of your code, between the opening and closing <title> tags, enter the title for this page “My Favorite Music”
Page Body
Between the <body> tags, in line 9 we will enter the body of our page, I am going to use lists of my favorite bands and songs to demonstrate the different types of lists.
There are 2 (arguably 3) types of lists: Ordered; Un-ordered; and Definition.
- Ordered = Numbered from 1 to X
- Un-ordered = No order or ranking, uses bullet points
- Definition = similar to a dictionary definition layout.
Follow the next sections, you may want to follow it a section at a time and take a break in between if you find it will make it easier.
Ordered Lists
<ol> and </ol> are the opening and closing tags for an Ordered List.
Between the above tags, we will enter the individual List Items between <li> and </li> tags.
When I start a list, I always enter the opening tags for the list first (<ol> and </ol> in this case), this ensures that I do not forget the closing tags.
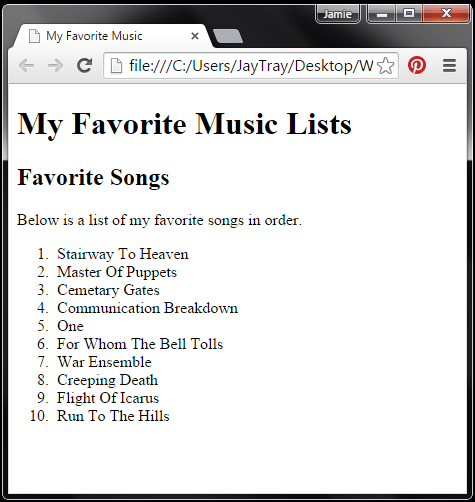
Before adding the list, we will add some text to the body of the page. See lines 9 to 11 below, there are 3 types of text
- A Level 1 Heading that says “My Favorite Music Lists”
- A Level 2 Heading that says “Favorite Songs”
- A paragraph that says “Below is a list of my favorite songs in order.”
Now we will start our first list. Remember all list items are contained between <ol> and </ol> tags.
I use indenting to make it a bit easier to read. Lines 12 to 23 below is the code for an Ordered List with 10 List Items.
After typing the code, save the file and view the page in your web browser.
Un-Ordered List
Next we will add an un-ordered list which is a list of bullet points.
We will add a level 2 heading and some paragraph text, then an un-ordered list with 5 list items.
<ul> and </ul> are the opening and closing tags for the un-ordered list. Each item in between is contained again within List Item tags <li> and </li>.
See lines 25 to 33 below.
Save your file and refresh the page in your browser.
Nested Lists
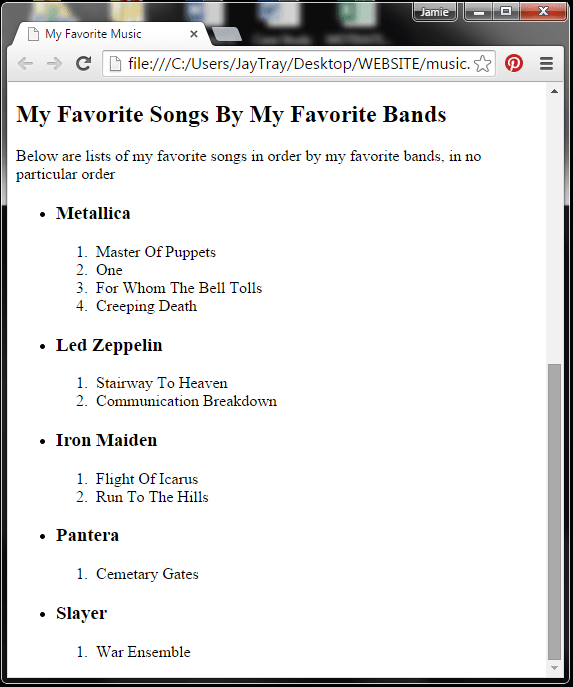
Before moving onto the 3rd type of list, I would like to show you nested lists. This is a list inside a list.
To demonstrate I will create an un-ordered list of my favorite bands, and under each band name, I will have a list of my favorite songs by that band in an ordered list.
Again, I will add a Level 2 Heading and some paragraph text first.
The ordered list and un-ordered lists are still contained with <ol> and <ul> tags as before. To make the band names stand out a bit more, we will put them in between <h3> tags.
It is important to note here that when we add the first band (Metallica) for the un-ordered list, Metallica is the first list item and then the ordered list is also part of the first list item.
So, you will see that the Metallica list item starts with <li> but the matching closing tag </li> is entered after the nested list.
The opening tag is on line 38 and the closing tag is on line 45. Led Zeppelin is then the second list item of the un-ordered list and the closing </li> tag for this list item comes after the nested ordered list. See lines 46 and 51 below.
Take the time to read through the code, match the opening and closing tags and make sure you are comfortable with what you see.
This is one of the reasons I type closing tags after typing the opening tags. When it comes to lists like this, it can be easy to forget to close a tag.
Definition Lists
The definition list <dl> is made up of definition terms <dt> and definition descriptions <dd>.
The definition list contains the term and descriptions.
Below Metallica is the definition term and the brief description of who they are is the definition description.
NOTE In the text editor, lines 73 to 76 were all one line and I would have had to scroll to the right to see all the text, so to make it easier to display here, I pressed the return key to wrap the line across multiple lines.
Compare where I have wrapped the lines in the text editor to how the lines are wrapped in the browser image. They are different.
In the text editor, pressing the return key after text does not mean that the browser will display the following text on a new line.
We will cover this later.
Next Time…
So far the site is very bare with just text and lists, you are probably getting bored and looking to improve the look of the site.
Next time I want to talk about links and images and then after that we will look at formatting and layouts.
[grwebform url=”http://app.getresponse.com/view_webform.js?wid=4307503&u=CucD” css=”on”/]


