Excel VBA Macros : Format Text
The Story So Far…
In our last post (click here to read it) we created a macro called “mySecondMacro”.
This changed the 4 headings on our file to this…
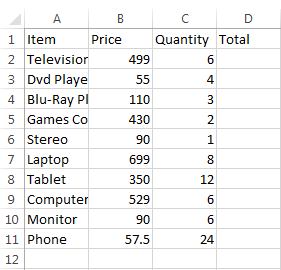
… and our Macro was this…

If you have been following these posts you will already have a file saved as above. Or you can download this file Macros_Example_A
We are now going to start looking at some formatting options for our headers.
Formatting Text
Formatting Font
When it comes to formatting font, there are several options you can change, these include (but are not limited to)
- Color
- Bold
- Underline
- Size
- Font Name
- Strikethrough
- Subscript
- Superscript
Code Snippet – Change Font size, color, bold, italic, underline & type
Selection.Font.Bold = True
First, you select your cell or range of cells to be changed. Then change the font option you want to change.
In this example we are setting Bold to be True, that is, making the selection Bold.
If we wanted to change a few options of the same selection we can use a With statement.
With Selection.Font
End With
Each option that we want to change goes between these two lines. The option starts with a period ( .).
To make code easier to read, I suggest indenting.
I will select row 1 and then change the font to be Bold, Italic, Underlined, red color, font size 12 and font name Bookman Old Style.
I will use a With statement to do this.
- Rows(“1:1”).Select
- With Selection.Font
- .Bold = True
- .Italic = True
- .Underline = xlUnderlineStyleSingle
- .Name = “Bookman Old Style”
- .Size = 12
- .Color = -16776961
- End With
How did I know that -16776961 was red?
The answer is I didn’t!
I opened another file, type random text in a cell, recorded a macro and changed that font color to red, then I looked at the code generated for that macro.
Code Snippet – Alignment
Next we are going to change the alignment of the text in our headers.
We will set the alignment as centered both horizontally and vertically and we will wrap the text (if the text is too wide for the cell width, it will be shown as 2 or more lines in the cell).
- With Selection
- .HorizontalAlignment = xlCenter
- .VerticalAlignment = xlCenter
- .WrapText = True
- End With
Our Code Changes
To format our headers, we will add the code below to our macro.
After the second last line of our current macro (line above “End Sub”) enter this code. To make the code easier to read, use the tab key to indent the With statements.
- Rows(“1:1”).Select
- With Selection.Font
- .Bold = True
- .Italic = True
- .Underline = xlUnderlineStyleSingle
- .Name = “Bookman Old Style”
- .Size = 12
- .Color = -16776961
- End With
- With Selection
- .HorizontalAlignment = xlCenter
- .VerticalAlignment = xlCenter
- .WrapText = True
- End With

When you run this macro you should get…

Make Changes Yourself
After running the macro, I’ve decided I think the font size is too big and I don’t like the WrapText in the headers.
Change the font size to 12 and turn off WrapText.
Can you do it?

Don’t worry about column widths yet, this will be taken care of later.
What Next?
Next time, we will add formula to cell D2 to multiply the price by quantity in row 2.
After that, we will use our first variable to copy the D2 formula down to the bottom of the table.
